Wednesday, September 30, 2009

Day 3 of some of my favorite Fall Fest projects

Here is my last day of some of my favorite Fall Fest projects. The first batch use the Sweet Treats and Treat Cups from the Holiday Mini. How great are they! Dana Gestwick did a whole demonstration on these. So many cute ideas and tips.


The next one is made by my friend Debbie Modrowsky . I would have never thought to put sunflower seeds inside. She made this as part of the Wow swap and I couldn't wait to take a picture of it! Just beautiful!


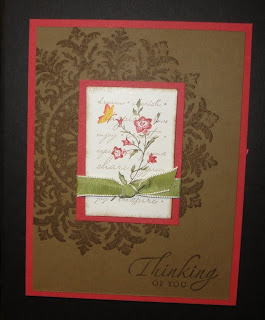
The next card I am not sure who made it, but I love the simple elegance of the card. Did I mention that I won this set, Charming as a door prize on Saturday!!! So excited, can't wait to play with it.


How great is this stationary box and set that my friend Natalie Meyer made for me. This is part of the wow swap that she made. She is just so fabulous, she made me one. The note paper says From the Desk of ... Stasia I can't wait to use it!!!


Next comes a stationary box that was made by Stephanie Rodgers. It is absolutely gorgeous work!


Last but not least is a swap I received from my friend, Kim Lampone she made this beautiful holiday card with the Dazzling Diamonds technique! Simple beautiful elegance.


Want to join me at the next regional Stampin' Up! event, email me and I will make sure to let you know when it is. It truly is a fun filled day filled with inspiration!!

Tuesday, September 29, 2009

New Clearance Rack in the Online Store

There is a new section of the online store called the Clearance Rack. You will find lots of old retired favorites in the Clearance Rack. Stampin' Up! is clearing out it's inventory of surplus items that have been retired. Many of these retired items will be offered at a substantially reduced price.

Click here to check them out and start shopping! There is a limited quantity of these wonderful accessories, so make sure to get them while they last. Offers are only available while placing an online order.

Some of my favorite Fall Fest Projects Day 2

Here is day two of posting some of my favorite Fall Fest Projects. Now I am sure some of my fellow demonstrators are visiting my blog and going why are not some of my projects up there, I have to say I am having a hard time picking favorites. This has not been an easy task by any means!!! I am sure there are many that I am not posting!!!
Today's posts I am not sure who created some of them. The ones I do know and recognize their work is as follows: The Bermuda Bay card, I am pretty sure is a Karen Barber card. The Build a Bear bulletin board was created by Kristen Kortonick. The memo cube is Kelly Mahoney.


Monday, September 28, 2009

Some of my favorite Fall Fest projects

Well I have to say it was hard to just pick a handful of my favorite Fall Fest projects there was just so many wonderful things on display and projects that were swapped and given.

So I am just going to post a few of them in the next couple of days. I am going to start with the Halloween and Fall themed projects.


Matchbox Fall box created by Lorraine Mastalski


Beautiful fall card by Tina Rosenkrans


Beautiful tag by Michelle Zindorf


Another great fall card, by Karen Barber
I am not sure who made, but I think it is so cute. Love the use of the Top Note Sizzex.


I am not sure how this card was made or who made it, but I have to say I love the way it came out. I am thinking dry embossing happened, but if they had a template or how it was done, I am not sure.
Here is my most favorite display of all, created by Amie Adler. Love this halloween display!!!

Sunday, September 27, 2009

Great Day at Fall Fest

We just finished a fabulous day at Fall Fest on Saturday here in NJ. It was a fun filled day of stamping, inspiration and catching up with old friends and making new ones. We had two very extremely talented artists at our Stampin' Up! regional event, Michelle Zindof and Karen Barber who taught us a beautiful sponging technique and black magic. All the projects we made were amazing. I would post the projects, but you have to wait and see. They are such great projects and ideas, you are sure to see them in my future workshops!

Here are some pictures taken of the day. Stay tuned tomorrow for some of my favorite projects. Click on the individuals names to see their beautiful work. We really have some INKredible stampers in our group! The talent is just amazing!


Tina Rosenkrans and Karen Barber


Michelle Zindorf and Kathryn Roberts


Debra Jacobsen, Debbie Modrowsky and Lorraine Mastalski


Kristen Kortonick


Natalie Meyer, Me and Kim Lampone

Friday, September 25, 2009

Sweet Treats Holiday Decoration

I have to say I love the way this holiday decoration came out.

Here are the ingredients to make the project:
Stamp Sets: Sweet Centers
Ink: Basic Gray
Paper: Cast-a-Spell Designer Series Paper, Basic Black, Whisper White
Accessories: Sweet Treats Centers, Pumpkin Pie Grosgrain Ribbon, Pumpkin Pie Brads, Black Wide Grosgrain Ribbon
Tools: Big Shot, Scallop Square, 1 3/4" Circle Punch
Misc. Household Items: Candy Corn, Mason Jar and Bamboo Skewer

Special touches to the project: I used pop-up glue dots to keep the square attached to the skewer

Thursday, September 24, 2009

Inkredible Color Challenge

Here is this week's Inkredible Color Challenge. The colors are Old Olive, Chocolate Chip and Pumpkin Pie. A perfect recipe for a fall project.

Here are the ingredients to make my fall card:
Stamp Sets: The More the Merrier (hostess set), Holiday Blitz
Ink: Chocolate Chip, Old Olive and Pumpkin Pie
Paper: Chocolate Chip, Very Vanilla, Cast-a-Spell Designer Series Paper
Accessories: Chocolate Chip Courdury Button, Linen Thread
Tools: 1 3/8" circle punch, Big Shot, Scallop Square Sizzex

Special touches on the card: The acorn and leaf images were stamped, colored in, cut out and attached to the card with dimensionals. The squares were cut in 1.5" x 1.5"

Wednesday, September 23, 2009

CD Photo Holder

I collected a year of photos from my year with my guy and I burned them all on a cd of for him. Here is the cd holder I made to put them in. I took a piece of 5 1/2" x 11" piece of card stock and folded it in half.


Ingredients to make the holder:
Paper: Autumn Traditions Designer Series Paper, Always Artichoke Patterns Designer Series Paper (retired), Sahara Sand, Whisper White, Eggplant Envy, Always Artichoke
Accessories: Twill Tape, Always Artichoke Buttons, Vintage Brads, On Board Chipboard
Tools: Big Shot, Leaves #2 Sizzex, Timeless Type Sizzlets, Leaf Punch from a local craft store, Large Oval Punch

Tuesday, September 22, 2009

Rollin' Rollin' Rollin'

It's been a while since I posted a scrapbook page. Here is one I did of my nephew and when he first started to roll around. What a difference from when I took these pictures and him today. You can't keep up with him, he is running around so fast.

Here are the ingredients to make the page:
Paper: Tall Tales Designer Series Paper, Whisper White, Old Olive, Chocolate Chip
Accessories: Latte Designer Series Buttons, Linen Thread, Chocolate Chip Wide Grosgrain Ribbon
Tools: Big Shot, Go-Go Boots Sizzlets, Lots of Tags Sizzlets

Monday, September 21, 2009

Keep it Simple Sweetie


Here is my Pals Paper Arts challenge for this week. The challenge is keeping it simple, KISS. So I pulled out an old favorite for this challenge, Baroque Motifs.
Here are the ingredients to make this card:
Stamp Sets: Baroque Motifs, Fundamental Phrases
Ink: More Mustard, Really Rust
Paper: Very Vanilla, More Mustard, Really Rust
Accessories: Gold Brads
Tools: Scallop Circle Punch
Special Touches on this Card: I made it a gate fold card. The flower image was stampe cut out and attached to the scallop circle punch with a gold brad.

Inkredible Color Challenge

Here's the color challenge for last week: Brocade Blue, Night of Navy and Garden Green. I'm just a little late in posting.

Ingredients to make this card:
Stamp Sets: Happy Together, Love You Much
Ink: Brocade Blue, Night of Navy, Garden Green, Ruby Red
Paper: Brocade Blue, Night of Navy, Whisper White, Brocade Blue Patterns Designer Series Paper
Accessories: Pretties Kit
Tools: Scallop Square Sizzex, Big Shot

Thursday, September 17, 2009

Wedding Card


I almost forgot to post the wedding card that I made for my sister's wedding.
Here are the ingredients to make the card:
Stamp Sets: Baroque Motifs, Together Forever
Ink: Gold Metallic
Paper: Whisper White, Metallic Gold and Bride Speciality Paper, Clear Embossing Powder
Accessories: Pretties Kit and White Taffeta Ribbon
Tools: Heat Tool, Big Shot Top Note Sizzex, Crop-a-dile
Special Touches on this card: There are quite a few special touches on this card. The first was the heat embossing of the gold ink. Then I die cut the white and the gold card stock with the Top Note. I cut around the perforated edge on the white and layered it on the gold. I then punched a hole and threaded the ribbon around and tied a knot.

Wednesday, September 16, 2009

Mojo Monday #14

Here is this week's Mojo Monday. It's my one year anniversary with my guy today and here is the card I made to give him. I completely used Julee Tilman's idea on the mojomonday blog for my card's inspiration.

Here are the ingredients to make the card:
Stamp Sets: All Year Cheer III(retired), Note to Self
Ink: Chocolate Chip
Paper: Bella Rose Designer Series Paper (retired), Parisian Breeze Speciality Desiger Series Paper (retired), Kraft Patterns Designer Series Paper (retired), Chocolate Chip and Very Vanilla
Accessories: Chocolate Chip Courduroy Button, Linen Thread, Twill Tape, Vintage Brads
Tools: Crafter's Tool Kit, Big Shot, Hearts Sizzlets, Heart to Heart Punch, Circle Scissor Plus, Sponge

Special Touches on the Card: I used my Stampin' Write Markers to seperate the greeting on to the two circles. I sponged on some chocolate chip ink so the very vanilla was not so bright. I frayed the edges of the twill tape. Lastly, I used the hammer from the crafter's tool kit to pound on the brads so they looked more like nails than brads. The hearts were attached with dimensionals. I adhered the circles on top of the twill tape with sticky strip so they wouldn't fall off.

Tuesday, September 15, 2009

Another Pals Paper Arts Challenge

I enjoyed this weeks's sketch so much I made another card with it. This one for an upcoming birthday.

Here are the ingredients to make the card:
Stamp Sets: Fun & Fast Notes, On Your Birthday
Ink: Regal Rose, So Saffron
Paper: Regal Rose Patterns Designer Series Paper (retired), Whisper White
Accessories: Whisper White Organza Ribbon, Half Back Pearls, Crystal Effects, Dazzling Diamonds
Tools: Tag Corner Punch

Special Touches on this card: I applied some crystal effects on the frosting parts of the card and then while it was still wet, I added some dazzling diamonds. The greeting was stamped and then the tag corner made the tag corners. A strip of whisper White as added to the bottom


Monday, September 14, 2009

Pals Paper Arts Challenge #7

This week's Pals Paper Arts challenge is a sketch one. I have to say I am liking this one. Very simple and very versatile. I pulled out the hostess exclusive stamp set available in the Holiday Mini for this one! I am loving this stamp set.


Here are the ingredients to make this holiday card:
Stamp Sets: Patterned Pines, Christmas Greetings
Ink: Bermuda Bay
Paper: Thoroughly Modern Designer Series Paper, Soft Suede, Whisper White
Accessories: Rhinestone Brads, Soft Suede Polka Dot Grosgrain Ribbon


Sunday, September 13, 2009

Mojo Monday Continues


I am just making it under the wire this week for this week's Mojo Monday challenge. I finally had a chance to create something.

Here are the ingredients to make this card:
Stamp Set: Happy Together, Full of Life
Ink: Soft Suede
Paper: Autumn Traditions Designer Series Paper, Very Vanilla
Accessories: Soft Suede Polka Dot Grosgrain Ribbon, 5/16" Vanilla Brads
Tools: Scallop Edge Border Punch

Special Touches on this Card: The birds were stamped and cut out and attached to the card with dimensionals.

Another Wedding Day Projects Post


Here are a few more wedding day projects I made. First is the wedding programs for the church. I think there were about 100 when we were all said and done. I printed the writing on the front of the program. Next I punched the eyelet border. Next came the swirl stamped from the Wedding Sweet stamp set. I embellished it with leaves punched from a leaf punch I got at the craft store and gold brads. The programs were done in 3 different color schemes: Bravo Burgundy, Riding Hood Red and Dusty Durango. The Riding Hood Red program, I punched Bella Rose Designer Series paper. In the Dusty Durango program Juntos designer series paper was punched to make the leaves. The finishing touches were the gold cord tied on top and the strips of card stock.

The next two projects were a joint effort in creativity and preparation by the bride. She designed the wine labels and the menus. We scanned the leaf from the wedding invitation.

Saturday, September 12, 2009

Wedding Day Projects

Here is just a few wedding projects I made for my sister and brother in-law. The wedding was this past Sunday and it was a beautiful day all around. She had a beautiful fall theme. It was so nice to create bridal projects with leaves versus the usual flowers. I loved being able to create in those beautiful fall colors. So here is the table where everyone were able to pick up their table setting cards. I have to say I love the way the overall table came out. I'm sorry I wasn't able to get a picture of the table before all the table settings cards went away, but I still think this photo captures the beauty of the table.

Here are the individual projects on the table. Unfortunatly I had to go to a local craft store to pick up some designer paper and accessories for the projects. Past and present SU paper just didn't do the justice for the color scheme I was looking for.


So the first project was the 130 table setting cards. I tried to make it as easy as possible and tried to assemble as much of the project ahead of time, so when we finally got the tables together all I needed to do was print, punch and adhere.

The SU products used in the project were the Big Shot, Leaves #2 Sizzex and the Large Oval Punch.


Next came the Wedding Wishes Vase. Here is the tag I made to tie around the top of the vase.


The SU products to make this was: Big Shot, Leaves #2 Sizzex, Clear Circle Sizzex.


Next came the card to write your wishes on.

The SU products to make this was: Big Shot, Leaves #2 Sizzex, Retired So Many Sayings stamp set, Riding Hood Red Classic Ink Pad


My last project was the photo frame. I have to say I love the way this came out.


The SU products used in this project were: Autumn Meadows Designer Series Paper from the Holiday Mini, Slit Punch, Very Vanilla Wide Grosgrain Ribbon, Half Back Pearls


Stay Tuned for a few more wedding projects to come in tomorrow...