Tuesday, June 30, 2009

Mojo Monday #93

Here is this week's Mojo Monday. It is not quite your standard card, it is 5" x 3.5" I started with making the scallop box with my scallop edge border punch. The box was 3 3/16" x 3 3/16". So once I got the scallop edge lining up to make a pretty box, I pretty much stopped and created a card around the new scallop box I created. I got the measurements from this month's demonstrator exclusive magazine, Stampin' Success. They did a card with the eyelet border punch. Let's just say after 3 squares and I didn't master the eyelet border to make it as pretty as the picture. I moved on and worked with the scallop border punch which was a little easier to work with to line up the corners. So next came a piece of the Razzleberry Lemonade designer series paper for the background. I colored in the image from the Kind & Caring Thoughts stamp set with my new InColor Stampin' Write Markers, Melon Mambo and Soft Suede. Next came the Polka Dot Grosgrain Ribbon that I turned over to just use the solid ribbon. Yes our new polka dot ribbon is double sided. Loving the Rich Razzleberry color. Next came the greeting from the Kind & Caring Thoughts stamp set punched out with the new Modern Label punch. The last touch was the three half back pearls.

Bye, Bye Baja Breeze


Only 24 hours away to the new catalog! I am closing off the Stampin' Up! year with one the most missed In Colors that everyone is praying makes it into a future Stampin' Up! catalog in the future. Here is a sympathycard I maded that I paired up the Baja Breeze with the Walk in the Paper designer series paper that will no longer be around after tomorrow as well. So last chance, place your order today before time is up. I started with a square I cut that I punched out 1 3/4" circle from the center. Next I corner rounded the corners. I put a piece of whisper white in back of the frame. Next I paper pierced the top left hand corner. Next I stamped the butterfly from the Great Friend stamp set. I cut it out and attached the butterly with two silver brads. The greeting comes from the Thoughts & Prayers stamp set. The last touch was the Basic Gray tafetta ribbon.

Monday, June 29, 2009

Perfect Princess

I am counting down the new catalog to all the retiring products. Here is a card made with the Perfect Princess stamp set that is retiring. Stay tuned you will see future projects with this set even though it is retiring. I have a little princess in my life and she never forgets to tell us so future projects are on the horizon. Here I started with a circle I die cut with Circle Sizzex and my Big Shot. I stamped the swirl image in Basic Gray and colored it in with my Regal Rose Stampin' Write Marker. I took out my two way glue pen and Dazzling Diamond to add a little bling to the swirl. Next I masked of the word happy with scotch tape and stamped the greeting in Basic Gray. I pulled of the scotch tape and then colored in the happy with Stampin' Write Marker and finally stamped the greeting. I then stamped the two butterflies from the set, colored them in and punched them out with the 3/4" circle punch. I added the two butterflies to the card with dimensionals. Next I cut of a strip of the bottom of the card, added a scallop white border. The background paper comes from the Regal Rose Patterns Hostess Pack. The last touch the white taffeta ribbon and rhinestone brads.


Sunday, June 28, 2009

Saying Goodbye to Wagon Full of Fun


Well there is only a few more days left for the Occasions Mini and I hate to say it but Wagon Full of Fun will not be making it. So if you enjoyed this set as much as me do not hesitate to put it on your order list now. Here I started with the Sizzex Circle which I die cut. I then stamped and colored in the cupcake with my Stampin' Write Markers. Next I added some crystal effects and sprinkled some Dazzling Diamonds and set it aside to dry. Next came the tag that I cut the diagonal strips and then punched out the horizontal slot to tie some Very Vanilla taffeta ribbon. Next came the scallop border which I paper pierced. The background I laid down some Candy Lane designer series paper and stamped the greeting from Big Bold Birthday which is also retiring. I need to get some birthday stamps because so many of mine are leaving!

Saturday, June 27, 2009

Big Bold Birthday Going Away

I have to say I love this cupcake set. It is such a great set. My favorite thing to do with this set is to stamp the bottom and the candle. Then use my scallop circle punch to punch the frosting out of polka dot designer series paper, cut the scallop in half and attach the frosting with dimensionals. The designer series paper of choice in this project is retired Pretty in Pink Prints paper. I stamped the Polka Dot background ont he bottom. The border between the top and the bottom is some Regal Rose wide grosgrain ribbon and two pretty in pink brads.


Friday, June 26, 2009

Good Morning Sunshine and Cheap Talk


Here is another card that made it to my B list for the Artisian Award that I ended up not submitting. I made another version of this card that I ended up liking a lot better and sending in. I started with punching square with the bright and cheery Good Morning Sunshine paper. I layered them on top of a piece of Old Olive. The birds were stamped from the Cheap Talk stamp set. I then stamped the greeting from the On Your Birthday stamp set. The last touch was the wide grosgrain ribbon, two latte buttons and a photo corner punch in Summer Sun. I have to say I will miss this designer series paper. Yes, another set of papers that bite the dust come July 1st. Very bright and cheery and so much fun!

Candy Lane, Riding Hood Red and Pink Pirouette Good Bye


I have to say I am going to miss the Pink Pirouette and the Riding Hood Red. I really love these two colors. Here is a pocket card I made with these colos along with the Candy Lane designer series paper. First you see the pocket, the pocket insert and the two combined. I stamped the love with my Schoolbook Serif Alphabet and Think Happy Stamp Set. I punched out the hearts with my Heart to Heart punch. I put one in the center of the love with a dimenisionals. The other two hearts I put them for the insert of the card. Eyelet border, button bouquet and pink pirouette grosgrain ribbon finish this card off. This was one my 2nd choice cards I made for the Artisian award that I ended up not mailing in to Stampin' Up! I made another card with this same color combo that ended up making it to my top 5 to send in. Only a few more days for these color and matching designer series paper and accessories. Make sure to place your orders now since the accessories are going fast and selling out!

Thursday, June 25, 2009

Just Beachy Homemade Gift Tag

I am sorry to say but the Just Beachy set also did not make it in from the Holiday Mini. Also another hint there is no other beach set in the 2009-10 Idea Book and Catalog. So if you want a set for your Summer scrapbook pages and projects don't hesitate to place an order for the set today. First I cut two circles, Whisper White and Green Galore with my Circle Scissors Plus. Next, I stamped the fist and colored them in with my Stampin' Write Markers. Next I laid down of the retired Rainbow Sherbert designer series paper on a piece of Tempting Turquiose. I put a strip of Green Galore in the center of the two, then I all three through the Big Shot with my Top Note die cut. I stamped the greeting from the On Your Birthday stamp set. Lastly, I pulled out my Crop-a-dile and put a pewter jumbo brad in the top and tied a tempting turquoise grosgrain ribbon to attach the tag to the gift bag.

Wednesday, June 24, 2009

Sweet Color Challenge

Here is this week's color challenge: Riding Hood Red, Kiwi Kiss, Baha Breeze, Kraft and Chocolate Chip. I have to say as much as I am loving the new colors, I have to say these colors were pretty awesome and I will be sorry to see them leave. I started with my Sizzex and the die cutting the Serif Essentials letters. Next I stamped the strawberries from the Tart & Tangy stamp set. I first stamped a strawberry in the Riding Hood Red and then I stamped a second one in Kiwi Kiss. I cut out the leaves from the Kiwi to place on top of the Riding Hood berries. I have to say I love have our new In Color markers after doing this two step stamping and cutting! I attached all the berries to the page with dimensionals. Next came the Kiwi Kiss Patterns Designer Series paper, followed by 3 riding hood red buttons from the Button Bouquet. Then wide chocolate chip grosgrain with a tailored bow followed by a kraft Scallop border. The last touch was the 2 strips of Kiwi and Riding Hood Red on the bottom.

Tuesday, June 23, 2009

Mojo Monday #92

Here is this week's Mojo Monday sketch. I pulled out the beautiful Razzleberry Lemonade. I have to say I am loving this paper. It is so bright and cheery perfect for the summer and happy cards. Here is I paired it up with the Upsy Daisy stamp set that I used our great In Color Stampin' Write Markers for. I used Garden Green for the stems. I then used my two way glue pen and some Dazzling Diamonds to give the card a little bling. I layered the image on top of Melon Mambo and then Rich Razzleberry that I put a scallop border along the bottom. Next I tied the Polka Dot Grosgrain Ribbon in the Rich Razzleberry and put a White button in the center that I attached with a glue dot. Next came the greeting from the On Your Birthday stamp set. I cut out squares and layered on top of the scallop square.

Monday, June 22, 2009

KWernerDesign Color Inspiration #55


I decided to do the color inspiration on kwernerdesign.com this week. The colors are Really Rust, More Mustard, Basic Gray and Very Vanilla. I have to say I love the way this came out. I wasn't sure what I was going to do with the Basic Gray and I love the the touch that color did for the page. So I started with the background paper from the Juntos designer series line. The title I mixed it up with Tim Holtz Grungeboard and On Board chipboard for the &. I sponged on some Very Vanilla craft ink first as a base to soften the color then I followed with some Basic Gray. The journaling was done inside a Top Note Sizzex die cut. I tied some Basic Gray taffeta ribbon. Next came the leaves from the retired With Gratitude stamp set. I colored them in with my Stampin' Write Markers and then colored them in. The finishing touches were the pewter jumbo eyelets, vintage brads.

Sunday, June 21, 2009

Homemade Bridal Shower Card

Last but not least here is the card I made for. I started with the Big Shot again and this time I made the texturz background with the Stampin' Up! Backgrounds. Then I made the Top Note diecut in the Pink and then the White. The White one I cut around the preferated edge to layer on top of the pink one. I stamped the heart from the Ever After set. Then the big shot came out again for the Lots of Tags Sizzlet. I stamped the greeting from the Together Forever set, I then punched it out with Wide Oval punch and layered in the center. Then came the pretties with the White Organza ribbon. The last touch was two half back pearls and a strip of pretty in pink. I hope you enjoyed my week of bridal shower projects. It was a lot of work, but I am really happy how it all came together.

Saturday, June 20, 2009

Wedding Shower Tag

Here is the wedding tag I made to put on one of the baskets. I started with the big Shot that I die cut the Lots of Tags. I then punched two holes and threaded the pink taffeta ribbon. I then punched another hole towards the bottom and threaded the second half of the ribbon and tied a bow. In the center I stamped from the Ever After stamp set. Next I covered a piece of chipboard with retired Pretty in Pink Prints designer series paper. I then came the greeting from the set. I also added an eyelet border and the pretties.


Friday, June 19, 2009

Wedding Shower Poem


To start the shower off, I did a little speech for the bride. It's no ordinary speech, it was filled with household products as we go to each one, we pulled out one of the products. So all the things in capital letters were household products we pulled out and gave to her. I did this about 8 years ago for my sister-in-law's shower and it's amazing how many things were no longer on the market. I had to go find subsititues. No YES and thank God there is no more RAVE. I think we killed the ozone with that one! There is a few others that needed to be substitued, but thank God I found new ones in the supermarket that day. So I decided to make the poem/speech as a keepsake for her. I started with On Board Basics Large that I covered with some Bella Rose. I printed the poem and punched a eyelet border on the side and adhered it to a piece of Riding Hood Red card stock. Then I diecut two flowers with the Bella Rose and put a corduroy button in the center. I also added two others on the bottom for accents. On the side of the chipboard came a strip of Bella Rose and wide chocolate chip grosgrain. To make sure it was a wall hanging, I punched two holes with my crop-a-dile and and pulled the ribbon through to make loop and tied a knot.


Here's the wedding poem: You are about to start a new ERA of your life. Who knew that when Tomek put that FANTASTIK DIAMOND on your finger and you said TOTALLY say yes that you would find so much JOY in your LIFE. Make sure you collect all your LUCKY CHARMS and break a WISHBONE so there will be SUNSHINE on the day you PLEDGE yourselves to each other. We hope that you always call each other HONEY and SUGAR and may the SPARKLE never leave your RED HOT love. Hope there are many KISSES and HUGGIES along with many SNUGGLES, but don't let Tomek get to bold until you are SURE. Remember we'll ALWAYS be there for you, to listen to your SECRETs and when you rave ALL about Tomek. When you send out a S.O.S., just DIAL the phone and we will be GLAD to help because we are your LIFESAVERS. But if all fails and you want to remain CAREFREE, just STAYFREE and be SOLO.

Thursday, June 18, 2009

Candy Cups


Well if you have been following along it's been a week of posting projects from my sister's bridal shower. The place they meet was a club called Bliss, so what better chocolates to put on the table than Bliss! So here are some candy cups I made. I searched in Michaels trying to find he perfect container to decorate to put the chocolates in only to find on in my office cafeteria. These are the soup containers! I just used my Circle Cutting System and cut out a circle of Bella Rose designer series paper to cover up the images on the soup cups. Then I pulled out the Flower Layers with Leaf and my Big Shot to make the flower and the 1 3/4" circle punch to put in the center. the last piece as a strip of Bella Rose that I adhered a white organza ribbon. The best part the cup was so full of chocolates that I didn't need to adhere the handle all I needed to do was slip in and it stayed in place.

Wednesday, June 17, 2009

Candy Bar Wrappers


Next came Bella Rose Designer Series Candy Bar Wrappers. How cute are these! Just wrap your designer series paper around a Hershey Bar. Die cut your flower and leaf with the Sizzex Flower Layers with Leaf with your Big Shot. Print out the Tag and punch it out to with the 1 3/4" circle punch. I attached the flowers and the flower center with Dimensionals to give the candy bar a little something extra.

Tuesday, June 16, 2009

Another Just Beachy Mojo Monday

Here is another Just Beachy Mojo Monday sketch. I just love this great beach set. I think all this gloomy rainy weather in NJ keeps bring out these bright and fun colors! I started with the fish from the set that I stamped in Basic Brown on Watercolor paper. I then colored in the fish with my Stampin' Write Markers, Dusty Durango and Pumpkin Pie and yes, I very old retired In Color Marigold Morning. I actually pulled the scrap piece of card stock out of my pile and saw how well it coordinated with the Razzleberry Lemonade paper that I decided to use it. I ran a piece through with my Sizzex Texturz plates. Next came a strip of Very Vanilla with two Vintage Brads. The last piece was the greeting from the retired All Year Cheer I stamp set with a small strip of the Razzleberry Lemonade for an accent. I just love this fun Father's Day card I made for my dad and my brother! Don't forget Sunday is Dad's day!

Bridal Shower Favor


Next came the favors. I had these simple candle holders. I decided to dress them up with Fall leaf foliage. I got really lucky I found these leaf trimmings during the Christmas Holiday season which matched the gold trim on the candle holders beautifully. The best part is that they fit into the leaf theme. I have to say I learned a great trick from my friend Sue when doing these favors. We used gold wire to tie the leaves on, no need for a hot glue gun. Just cut, wrap and you are done. We finished 72 of these favors in TWO hours. I was shocked and amazed they were done so quickly. The tag I punched gold metallic card stock with the Oval Scallop punch followed with the large oval punch. I punched a small hole and threaded through retired gold cord from the holiday mini last season. Stayed tuned for tomorrow for more bridal shower projects...

Monday, June 15, 2009

Bridal Shower Invitation

Well I am finally able to post some projects that I have been working on for the last couple of months. We just had my sister's bridal shower this past weekend so here is the invitation I made. I love the way it came out. The theme of her wedding is Fall, so I was happy to be able to incorporate leaves into her shower invitation. I was thrilled to be able to the find the right color gold when I printed the invitation out. The hardest part of the invitation was the scoring the copier paper. The paper was super thin and I was afraid I would rip it when I scored it. I stamped the leaf from the retired stamp set, With Graditude in gold ink. I heat embossed the leaf. I made a eyelet border with the Gold metallic paper. I made two holes with my crop-a-dile. The finishing touch was the Whisper White Organza Ribbon bow.


Sunday, June 14, 2009

This Week's Color Challenge

This week's color challenge is: More Mustard, Tempting Turquoise, Real Red and Garden Green. I decided to subsituted the Real Red for Riding Hood Red. We have only a few more week's left with this year's In Colors so I figured I would work the color into the challenge. I totally cased the scrapbook page from this month's Scrapbook etc. page 120. I started with the Rainbow Sherbert and Riding Hood Red Patterns Designer Series Paper. Then followed by a strip of white card stock, a scallop edge made with More Mustard and piece of Temptint Turquoise. On the left hand side came a strip of More Mustard, a very cute photo of my nephew with his mommy and More Mustard card stock that I ran through the Big Shot with my Texturz plates with Stampin' Up! Backgrounds I.

Next came the chipboard letters from the On Board Timeless Type that I sponged on some Garden Green craft ink I put More Mustard card stock in the background to add a little more color.

The flower is my favorite piece. I started with the Circle and the Flower Layers with Leaf that I ran through my big shot to make the the two images. Next, the turquoise circle was punched with the 1 3/4" circle punch, the Pattern Riding Hood Red was punched with the 1 3/8" circle punch. The flower and the 1/2" circle punch was made with the Garden Green Patterns designer series paper. The leaves were made with the Wide Oval punch and folded in half. I then tied a linen thread bow. Very cute touch.

The side I added some Dress Up Ribbon Originals with a tailored bow. I diecut some buttons with Buttons #5. Next came the retired Urban West rub-ons. I then punched out with the Wide Oval punch. The last touch was the More Mustard card stock on the side and Take Note Rub-Ons on the top and the bottom.

Saturday, June 13, 2009

Mod Collection Scrapbooking Page

Here is some paper I have from the Mod Collection I did a scrapbook page with my niece and her best friend Lexie. First came the striped paper on top of the Brocade Blue card stock. Then came the circle image from the collection. Next I covered some Riding Hood Patterns designer series paper on top of chipboard and then diecut a few Beautiful Butterflies. I put some So Saffron buttons in the center. I die cut the title with my Naturally Serif Sizzlet. Then the last touch was the photo corner punch in the right hand corner. I love how this paper matches all our Stampin' Up! colors!

Friday, June 12, 2009

Great Friend with Bella Rose designer series paper

Here is a card made with the Great Friend stamp set. I stamped the butterflies from the set in Tangerine Tango. I stamped the image and then cut it out and then attached the butterflies to the card with two gold brads. The background of the card was the Bella Rose designer series paper. I stamped the greeting from the Sincere Salutations stamp set. I punched the greeting out with my Wide Oval punch and the layered on top of the tag image I diecut with the Lots of Tags. The top of the card there was a strip of Tangerine Tango and the bottom of the card came the eyelet border.

Thursday, June 11, 2009

Lovin' the Cupcake from the Wagon Full of Fun

Here is the great cupcake from the Wagon Full of Fun stamp set from the Occasions Mini. Only one more month for the new catalog. So that means bye bye to the Wagon Full of Fun stamp set, Candy Lane designer series paper and Pink Piroutette card stock and accessories, all featured in this card. I diecut the circle with the Circles #2 Sizzex and then stamped the image in Basic Brown and colored in the cupcake with my Stampin' Write Markers. Next came another circle die cut with my Big Shot and Circle #2 and a piece of chipboard covere in Pink Pirouette. I punched two holes in the circle with my crop-a-dile and then died some natural hemp to make it look like a button. The scallop border was done on the bottom and then a ribbon was tied on top.

Wednesday, June 10, 2009

This Week's Color Challenge.

Here is this week's color challenge: Barely Banana, Bordering Blue and Garden Green. I started with the Flower Layers diecut that I then ran through with Textured Plates, Stampin' Up! Backgrounds I. Next came the Circle Circus image I colored in the image with my Stampin' Write Markers and punched it out with my Scallop Circle. I attached it to the die cut with Stampin' Dimensionals. Then in the center of the flower I put a button from the Button Latte buttons. Next came two leaves from the Flower Layers with Leaf die cut. I layered the image on top of the Barely Banana card stock. I then stamped the greeting from the Great Friend stamp set. The finishing accessories were gold brads, eyelet border punch and whisper white satin ribbon tied in a knot.

Tuesday, June 9, 2009

Just Beachy Mojo Monday 90


Here is this week's Mojo Monday sketch using the wonderful Just Beachy set from the Occasions Mini. I pulled out my new In Colors for this card along with the great new designer series paper, Razzleberry Lemonade for the background. The sun and the flip flops were colored in and cut out and attached to the card with dimensionals. The top of the card, I added some paper piercing and a strip of the Dusty Durango. The greeting comes from the Everyday Flexible Phrases. The bottom of the card, I ran a piece of the Durango with my texturized plates and then tied a knot with the Crushed Curry Polka Dot Grosgrain Ribbon. How great is it that you can turn the ribbon over and you have a solid grosgrain ribbon, two ribbons and one. Also as demonstrators we got our copies of the new Idea Book and Catalog already, when you get your copy you have to look very carefully on each page there are some great tips. The best one I have found so far is to spritz the cardstock before you run it through the texturized plates it will give a better impression. I have to say it works, loving the polka dot texurized image at the bottom of this card.


Monday, June 8, 2009

Playing with More New 09-10 Idea Book Products

Yes, I am just loving the new colors, paper and accessories. I started with the Tag Scallop die cut and Big Shot. I covered the bottom half of the tag with the Razzleberry Lemonade designer series paper. Then came a strip of Rich Razzleberry and the Only Ovals image with Stampin' Write Markers. I then punched the images the Oval punches. Then a bow was tied with the Polka Dot Rich Razzleberry Grosgrain Ribbon and attached to the tag with a pop up glue dot. The last touch was jumbo silver brads.


Sunday, June 7, 2009

Sneak Peak into the 2009-10 Fall Winter Idea Book

Here is a sneak peak into the new 2009-10 Fall Winter Idea Book and Catalog. It started with one inch squares of the new In Colors 2009-10: Rich Razzleberry, Melon Mambo, Crushed Curry, Dusty Durango, Bermuda Bay and Soft Suede. I also stamped the Circle Circus images. Next I used my new In Color Stampin' Write Markers to color in the greeting from the Only Ovals. Yes, how exciting it is to have the new In Colors in markers!!! I punched the Large Oval and then the Oval Scallop. I then layered the card onto a piece of Rich Razzleberry. I love how this one card used so many new products that are going to be available in the new catalog!


Saturday, June 6, 2009

Homemade Sympathy Card


Here is a homemade sympathy card I made using the Eastern Bloom stamp set. I stamped the flower in Really Rust and layered it on Juntos designer series paper. Next came the Vanilla Taffeta ribbon. The greeting comes from the retired Brighter Tomorrow. The finishing touch is the half back pearls from my pretties kit.

Friday, June 5, 2009

Baby Girl Card

Here is the card to match the gifts from yesterday. I diecut the word Baby with the Serif Essentials Sizzex Die Cut with the Spring Fling designer series paper. The bottom of the card I use used the Tea Party designer series paper. Next came the trio flower punch with pretty in pink brads. The finishing touches were the eyelet border and the pretty in pink taffeta ribbon with a tailored bow.

Thursday, June 4, 2009

It's a Girl!


I went to a baby shower this past week. Here are some projects that I made for the mommy and baby. The first one is a mini chipboard brag book. It started with some chipboard and Sizzex tag diecut that I covered with retired Spring Fling Paper. I die cut the title, with the Go-Go Boots Sizzlets. I then pulled ou the chipboard coasters again and covered it with white card stock and die cut the Flower Layers to make the cute little flowers. The center I used my circle punches and put a piece of coordinating designer paper in the center. The bottom of the tag I put a eyelet border and pink pirouetter ribbon was tied on top.
The next gift was a wall hanging to a picture of their precious little one when she arrives. This time I covered On Board Book Basics Large. The same products and techniques were done on this project the only addition was the white jumbo brads.

Wednesday, June 3, 2009

Happy Birthday Dad!


Happy Birthday Dad! Yes, it's my dad's birthday today. It's a milestone birthday, he turns the big 60. The colors used in this card just happen to be the color challenge for this week: Tempting Turquoise, Green Galore, Apricot Appeal and Gable Green. I decided to pull the Rainbow Sherbert designer series paper for this project. I pulled out an American Coaster and covered it with Tempting Turquoise card stock. I diecut the star with a old star Sizzex and then the 60 with the Go-Go Boots Sizzlets. I then stamped the greeting using the happy from Polka Dot & Paisley and then the Birthday comes from the Big Bold Birthday. The finishing touches were the tempting turquoise grosgrain ribbon, scallop edge border and stars with silver brads with dimensionals.
Make sure to check out the following links for more ideas using the color combos of the week from our color girls: Colleen, Debbie, Lorraine, Kelly, Traci and Tracy

Tuesday, June 2, 2009

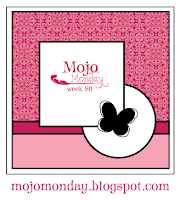
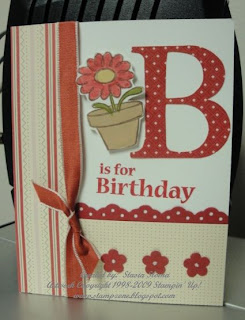
Mojo Monday Sketch 89

Here is this week's Mojo Monday sketch challenge. I pulled out the beautiful Garden Whimsy stamp set for this sketch. The background paper is the Tea Party designer series paper. The circles I cut out with my Circle Scissors Plus. The butterfly was stamped and then cut out and added to the page with dimensionals. The finishing touches was the certainly celery ribbon and the Filigree designer brads.

Monday, June 1, 2009

Retirement Open House


This year's retirement open house will be held on two dates:
Monday, June 22nd 7 p.m.
Tuesday, June 23rd 7 p.m.

We will be making three cards.

Place any order and go home with a bag full of card samples!

Please RSVP as soon as possible for all events so that the card stock is ready for everyone to start stamping when the event begins.